Express.jsはセキュアで堅牢なREST APIを構築するための優れたテクノロジーですが、定義済みの構造を提供していません。そのミニマルな性質により、ルーティング、コードの組織化、セキュリティ対策などの重要な側面を手動で処理したり、利用可能なミドルウェアやライブラリを活用したりすることができます。
これに対し、Express.jsとNode.jsの上に構築されたNest.jsは、明確な構造、堅牢なコードの組織化アプローチ、簡素化された実装の詳細を提供するより高レベルの抽象化を導入しています。本質的に、Nest.jsは効率的でセキュアなバックエンドAPIやサービスを構築するためのより構造化されたアーキテクチャを提供します。
Nest.jsプロジェクトの設定
はじめに、以下のコマンドを実行して、Nest.jsのコマンドライン(CLI)をグローバルにインストールする必要があります。
npm i -g @nestjs/cli
インストールが完了したら、以下を実行して新しいプロジェクトを作成します。
nest new nest-jwt-api
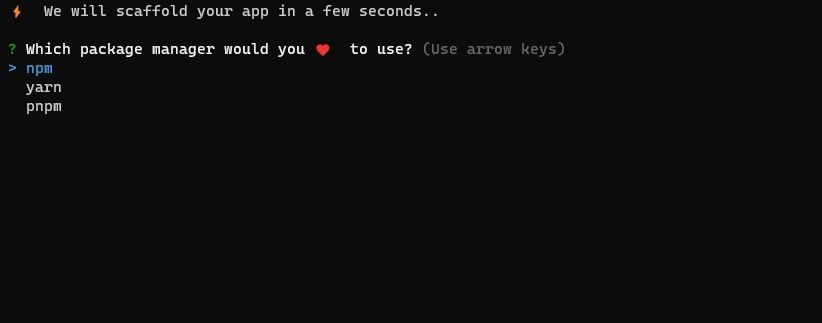
次に、Nest.js CLIは、依存関係をインストールするためのパッケージマネージャーを選択するように求めます。このチュートリアルでは、Node Package Managerであるnpmを使用します。npmを選択し、CLIが基本的なNest.jsプロジェクトを作成し、アプリケーションの実行に必要なすべての設定ファイルと初期依存関係をインストールするまで待ちます。
プロジェクトがセットアップされたら、プロジェクトディレクトリに移動して開発サーバーを起動します。
cd nest-jwt-apinpm run start
最後に、以下のコマンドを実行して、このプロジェクトで使用するパッケージをインストールします。
npm install mongodb mongoose @nestjs/mongoose @types/bcrypt bcrypt jsonwebtoken @nestjs/jwt
このプロジェクトのコードは、このGitHubリポジトリにあります。
MongoDBデータベース接続の設定
MongoDBデータベースをローカルにセットアップするか、クラウド上にMongoDBクラスタを設定します。データベースをセットアップしたら、データベース接続URI文字列をコピーし、プロジェクトフォルダのルートディレクトリに.envファイルを作成し、接続文字列を貼り付けます。
MONGO_URI="接続文字列"
次に、srcディレクトリファイルにあるapp.module.tsを更新して、次のようにMongooseを設定します。
import { Module } from '@nestjs/common';import { ConfigModule } from '@nestjs/config';import { MongooseModule } from '@nestjs/mongoose';import { AppController } from './app.controller';import { AppService } from './app.service';import { UserAuthModule } from './user-auth/user-auth.module';@Module({imports: [ConfigModule.forRoot({envFilePath: '.env',isGlobal: true,}),MongooseModule.forRoot(process.env.MONGO_URI),UserAuthModule,],controllers: [AppController],providers: [AppService],})export class AppModule {}
提供されたコードは、Nest.jsアプリケーションに3つの重要なモジュールを設定します。ConfigModuleは環境設定用、MongooseModuleはMongoDB接続の確立用、UserAuthModuleはユーザー認証用です。この段階では、UserAuthModuleがまだ定義されていないためエラーが発生する可能性があることに注意してください。ただし、次のセクションで作成します。
ユーザー認証モジュールの作成
クリーンで整理されたコードを維持するために、以下のコマンドを実行してユーザー認証モジュールを作成します。
nest g module user-auth
Nest.js CLIツールは、必要なモジュールファイルを自動的に生成します。さらに、app.module.tsファイルを更新し、ユーザー認証モジュールに関連する必要な変更を組み込みます。
手動でメインのプロジェクト設定ファイルを作成することもできますが、CLIツールは、必要な項目を自動的に作成し、app.module.tsファイルの変更をそれに応じて更新することで、このプロセスを簡素化します。
ユーザースキーマの作成
srcディレクトリの新しく作成されたuser-authフォルダ内で、新しいschemas/user-auth.schema.tsファイルを作成し、次のコードを追加してUserモデルのMongooseスキーマを作成します。
import { Prop, Schema, SchemaFactory } from '@nestjs/mongoose';import { Document } from 'mongoose';@Schema({ timestamps: true })export class User {@Prop()username: string;@Prop()password: string;}export type UserDocument = User & Document;export const UserSchema = SchemaFactory.createForClass(User);
ユーザー認証サービスの作成
次に、以下のコマンドを実行して、REST APIの認証ロジックを管理するユーザー認証サービスを作成しましょう。
nest g service user-auth
このコマンドは、user-authディレクトリ内にuser-auth.service.tsファイルを作成します。このファイルを開き、以下のコードで更新します。
- まず、次のインポートを行います。
import { Injectable, NotFoundException, Logger, UnauthorizedException } from '@nestjs/common';import { InjectModel } from '@nestjs/mongoose';import { Model } from 'mongoose';import { User } from './schemas/user-auth.schema';import * as bcrypt from 'bcrypt';import { JwtService } from '@nestjs/jwt'; - 次に、ユーザー登録、ログイン、すべてのユーザーデータルートを取得するための機能をカプセル化したUserAuthServiceクラスを作成します。
@Injectable()export class UserAuthService {private readonly logger = new Logger(UserAuthService.name);constructor( @InjectModel(User.name) private userModel: Model, private jwtService: JwtService) {}async registerUser(username: string, password: string): Promise {try {const hash = await bcrypt.hash(password, 10);await this.userModel.create({ username, password: hash });return { message: 'User registered successfully' };} catch (error) {throw new Error('An error occurred while registering the user');}}async loginUser(username: string, password: string): Promise {try {const user = await this.userModel.findOne({ username });if (!user) {throw new NotFoundException('User not found');}const passwordMatch = await bcrypt.compare(password, user.password);if (!passwordMatch) {throw new UnauthorizedException('Invalid login credentials');}const payload = { userId: user._id };const token = this.jwtService.sign(payload);return token;} catch (error) {console.log(error);throw new UnauthorizedException('An error occurred while logging in');}}async getUsers(): Promise {try {const users = await this.userModel.find({});return users;} catch (error) {this.logger.error(`An error occurred while retrieving users: ${error.message}`);throw new Error('An error occurred while retrieving users');}}}
UserAuthServiceクラスは、ユーザー登録、ログイン、ユーザーデータ取得のロジックを実装しています。userModelを使用してデータベースとやり取りし、登録時にパスワードをハッシュ化したり、ログイン資格情報を検証したり、認証に成功したらJWTトークンを生成したりするなど、必要な操作を実行します。
認証ガードの実装
機密リソースのセキュリティを確保するため、アクセスを許可されたユーザーに限定することが重要です。これは、保護されたエンドポイント(この場合はusersルート)に対する後続のAPIリクエストに有効なJWTが存在することを必須とするセキュリティ対策を適用することで実現されます。user-authディレクトリで、新しいauth.guard.tsファイルを作成し、以下のコードを追加します。
import { CanActivate, ExecutionContext, Injectable, UnauthorizedException } from '@nestjs/common';import { JwtService } from '@nestjs/jwt';import { Request } from 'express';import { secretKey } from './config';@Injectable()export class AuthGuard implements CanActivate {constructor(private jwtService: JwtService) {}async canActivate(context: ExecutionContext): Promise {const request = context.switchToHttp().getRequest();const token = this.extractTokenFromHeader(request);if (!token) {throw new UnauthorizedException();}try {const payload = await this.jwtService.verifyAsync(token, {secret: secretKey.secret,});request['user'] = payload;} catch {throw new UnauthorizedException();}return true;}private extractTokenFromHeader(request: Request): string | undefined {const [type, token] = request.headers.authorization?.split(' ') ?? [];return type === 'Bearer' ? token : undefined;}}
このコードは、公式ドキュメントに記載されているようにguardを実装して、ルートを保護し、有効なJWTトークンを持つ認証済みユーザーのみがアクセスできるようにします。
リクエストヘッダーからJWTトークンを抽出し、JwtServiceを使用してその真正性を検証し、デコードされたペイロードをrequest['user']プロパティに割り当てて、さらに処理できるようにします。トークンが存在しないか無効な場合、保護されたルートへのアクセスを防止するためにUnauthorizedExceptionをスローします。
次に、同じディレクトリにconfig.tsファイルを作成し、以下のコードを追加します。
export const secretKey = {secret: 'SECTRET VALUE.',};
この秘密鍵は、JWTの署名と真正性を検証するために使用されます。この鍵の値を安全に保管して、不正アクセスを防ぎ、JWTの整合性を保護することが重要です。
APIコントローラーの定義
ユーザー認証のAPIエンドポイントを処理するコントローラーを作成します。
nest g controller user-auth
次に、このGitHubリポジトリファイルで提供されているコードをコピーしてuser-auth.controller.tsファイルに追加します。ユーザー登録、ログイン、ユーザーデータの取得のためのエンドポイントを定義します。UseGuards(AuthGuard)デコレーターはgetUsersエンドポイントの認証を強制するために含まれており、認証されたユーザーのみがアクセスを許可されます。
user-auth.module.tsファイルの更新
プロジェクトに加えた変更を反映させるため、user-auth.module.tsファイルを更新して、ユーザー認証に必要なモジュール、サービス、コントローラーを構成します。
import { Module, NestModule, MiddlewareConsumer } from '@nestjs/common';import { JwtModule } from '@nestjs/jwt';import { UserAuthController } from './user-auth.controller';import { UserAuthService } from './user-auth.service';import { MongooseModule } from '@nestjs/mongoose';import { UserSchema } from './schemas/user-auth.schema';import { secretKey } from './config';@Module({imports: [MongooseModule.forFeature([{ name: 'User', schema: UserSchema }]),JwtModule.register({secret: secretKey.secret,signOptions: { expiresIn: '1h' },}),],controllers: [UserAuthController],providers: [UserAuthService],})export class UserAuthModule implements NestModule {configure(consumer: MiddlewareConsumer) {}}
最後に、開発サーバーを起動し、Postmanを使用してAPIエンドポイントをテストします。
npm run start
セキュアなNest.js REST APIの構築
セキュアなNest.js REST APIを構築するには、認証と認可にJWTに依存するだけでなく、包括的なアプローチが必要です。JWTは重要ですが、追加のセキュリティ対策を実装することも同様に重要です。
さらに、API開発のすべての段階でセキュリティを優先することで、バックエンドシステムのセキュリティを確保できます。
コメントする